

AI Recruit Assistant
The AI Recruit Assistant helps set up and adjust recruitment. Describe what you need in plain English and the assistant creates panels, screener questions, and quota groups, and sets your response limit. Open the assistant from the Recruit area. The available assistant experience can vary by rollout and your permission to edit the study.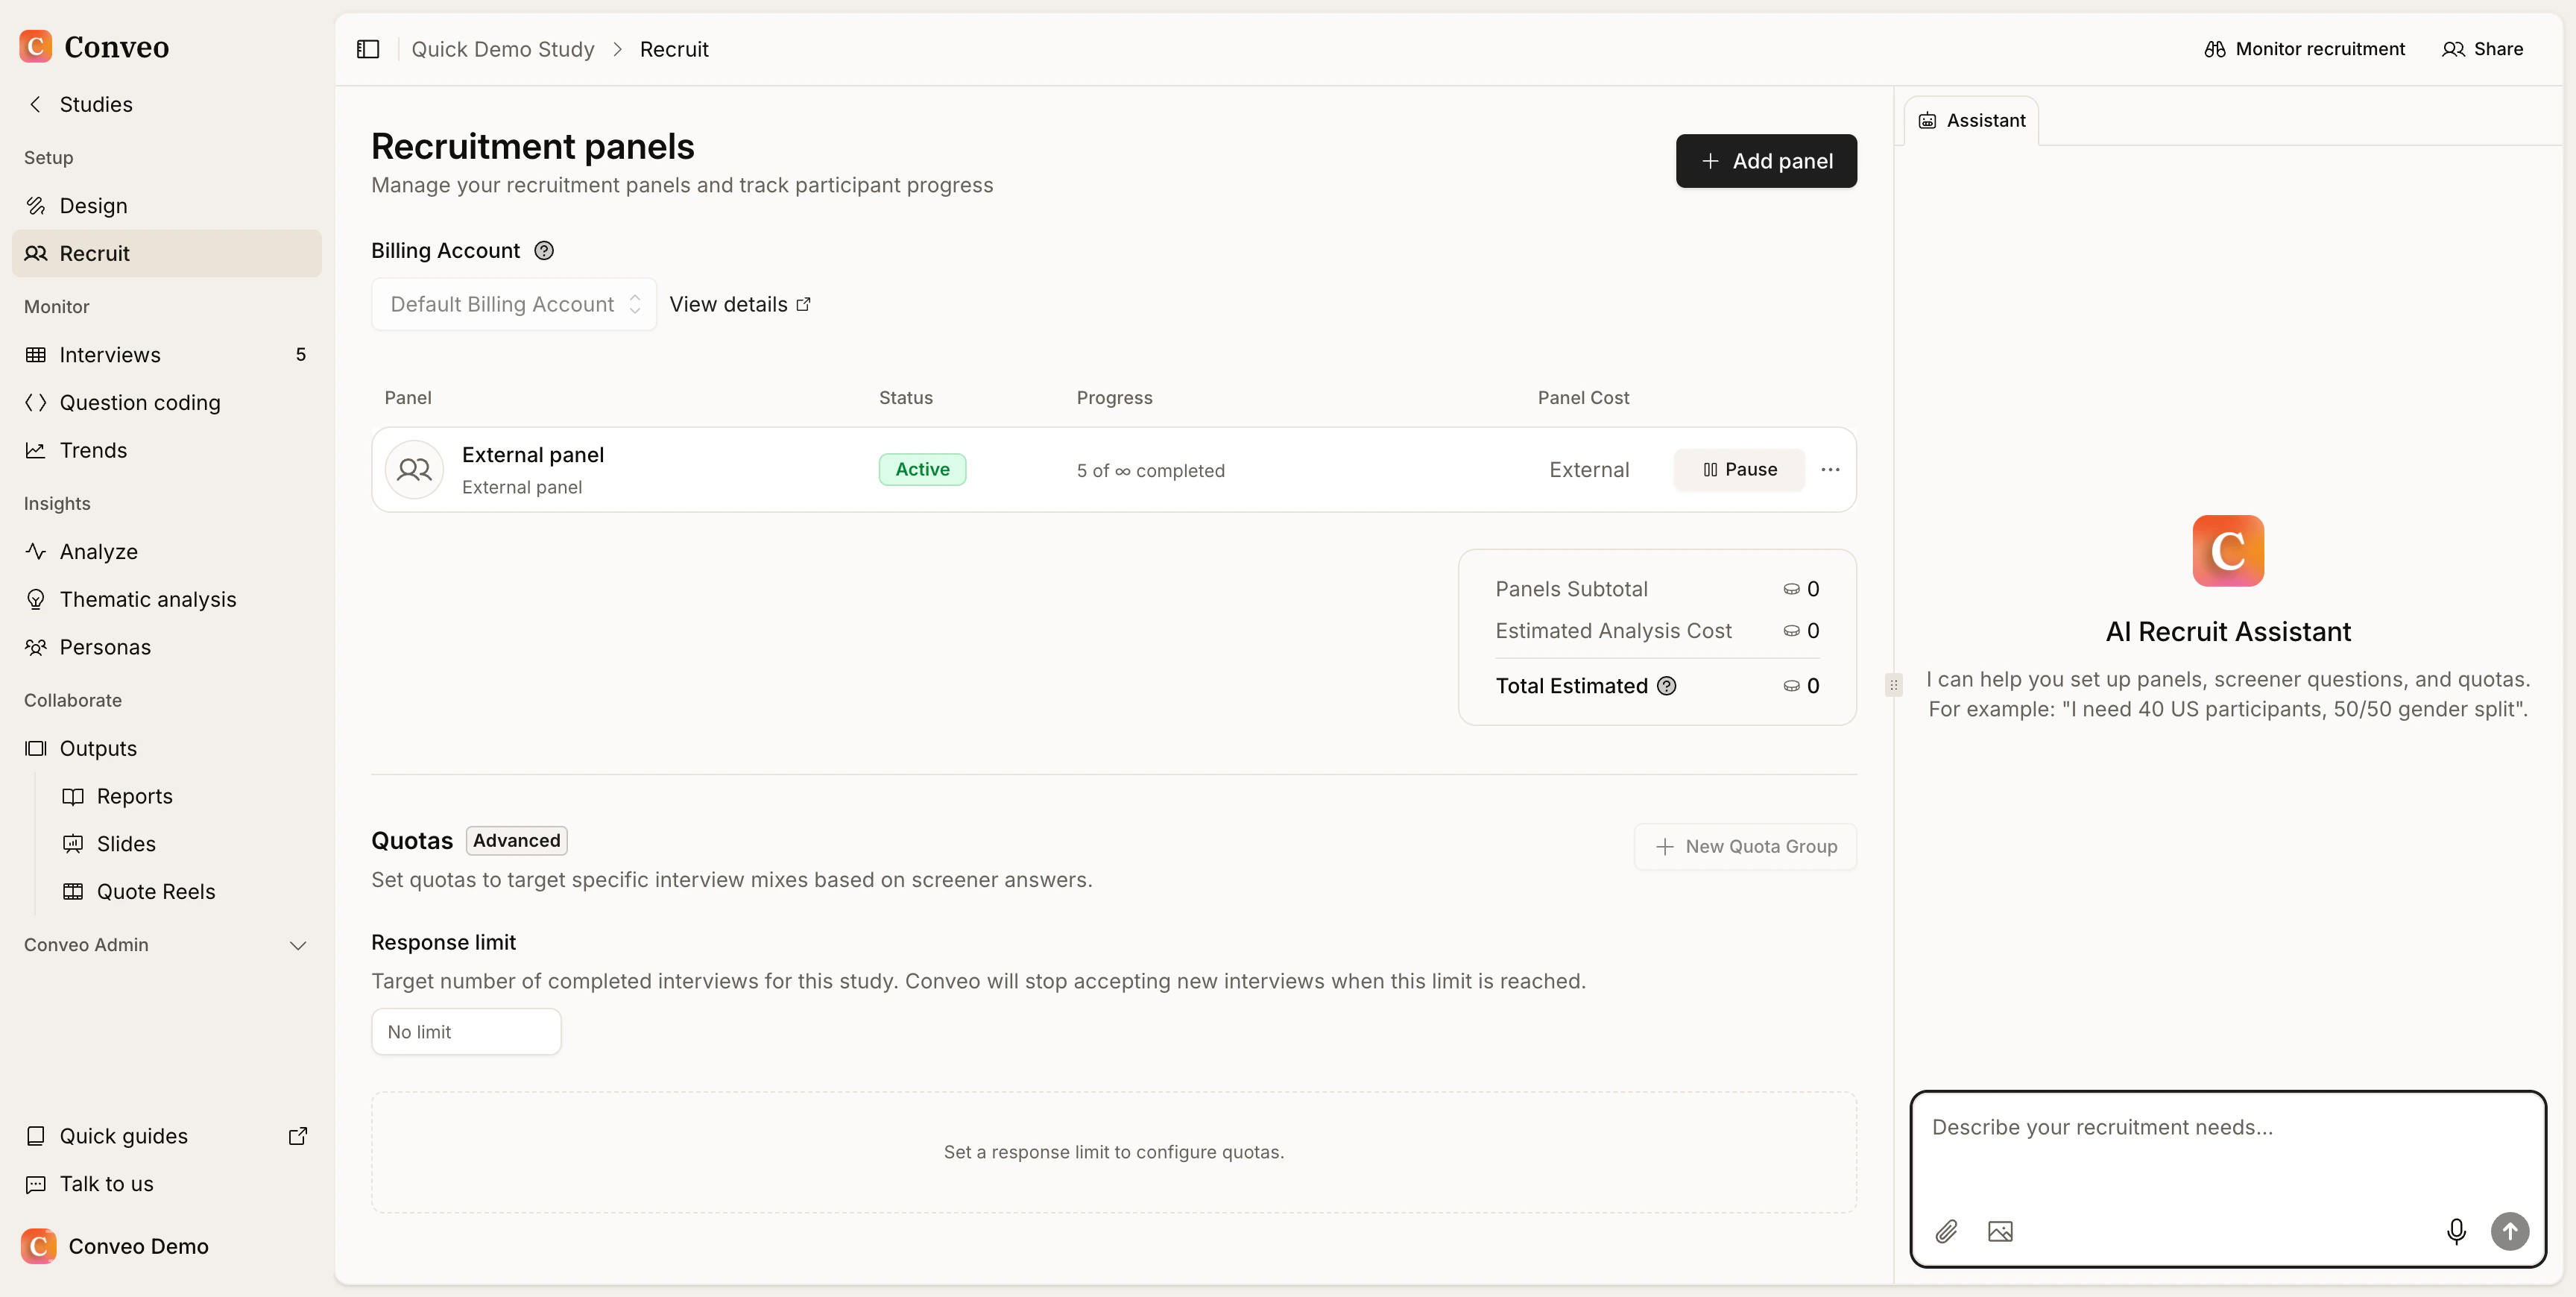
What it can do
- Create recruitment panels on Respondent.io or User Interviews, with the right countries, demographic targeting, incentive, and participant count. It can also split your sample across multiple panels (for example one panel per demographic cell).
- Add screener questions to qualify participants, following Conveo’s screener-writing rules (neutral wording, plausible decoy options).
- Create quota groups with segments, logic, and targets.
- Set the response limit for your study (required before quotas work).
How changes are applied
Before fieldwork, recruitment setup actions can apply directly to the study. Review the resulting panels, screeners, quotas, and response limit. Creating a panel does not launch it: launch remains a separate action. For a study already in field, the assistant is instructed to describe proposed changes and ask for confirmation before applying them. Read the proposed change carefully. This is an assistant behavior, not a substitute for reviewing live settings. The assistant can also pause or resume panels and adjust targets. Changing a live Respondent.io or User Interviews target, or a Respondent.io incentive, updates Conveo’s configuration without automatically updating the provider. Confirm the corresponding change with the provider.Example prompts
- “I need 40 US participants, 50/50 gender split.”
- “Create a User Interviews panel for parents in the UK aged 30–45.”
- “Set up gender quotas, minimum 20 male and 20 female, and set the response limit to 40.”
- “Split this into four panels: white male, white female, black male, black female, 10 each.”
When to use it
Use the assistant when you have a recruitment brief or need help diagnosing an underfilled sample. Edit the proposed setup in the Recruit tab when you need more control. Recruitment timing depends on participant availability and provider setup.Panel Recruitment Options
Conveo supports multiple recruitment approaches depending on how much control, automation, and external coordination you need.
Integrated providers include Respondent.io and User Interviews. Partner panels and integrations have provider-specific setup instructions. Use self-recruitment for an existing audience, a CSV participant list, or your own panel provider. Available targeting, quotes, and launch requirements depend on the provider.
Recruitment specifications define who you want to interview. A Respondent.io B2B panel requires at least one professional industry before launch, with up to five selections. An empty industry list blocks launch; it is not replaced with a default industry. B2C targeting uses its own topic settings instead. Review the targeting and previous-participant exclusion options available for the selected provider. Coordinate partner-panel requirements and quotes using that panel’s setup instructions.
For panels with in-product quotes, see requesting, launching, and approving partner-panel costs.
Pro Tips
- Match the study target, panel limits, and quota targets before launch; they are separate controls.
- Use CSV recruitment when you need individual invitation links and participant properties.
- Confirm provider-side changes when adjusting a panel already in field.
Recruitment Limits
A full panel or study can refuse new admission even while some interviews remain unfinished. This does not delete or invalidate the recruitment URL. Do not assume every panel includes a fixed 10% allowance; review the configured limits and provider terms.
For diary studies, distinguish people from entries. A recognized participant returning to the same panel can bypass its participant limit when multiple completions are enabled, a per-participant completion limit is set, and they have already completed an interview in that panel. The completion limit still applies. See returning participants and quotas for the separate quota checks.
Pause or close a panel
Use Pause for a temporary stop that you may resume later. Use Close panel only when recruitment is finished: closing an active or paused panel is irreversible, and the panel cannot be reopened or resumed. Study editing access is required. Conveo attempts to stop active provider recruitment before closing. A provider refusal or error prevents closure so you can resolve the issue and retry. Some integrations cannot confirm provider status; verify the provider-side stop when necessary. Closing blocks new admission through that panel; it does not erase interviews already collected. Closing a partner panel also notifies the partner. For panels using quotes, final-cost approval remains a separate step.Quick Reference
- Recruitment tab: Main area for setting up participant recruitment
- Add panel button: Access integrated third-party panel providers
- Self-recruited panel: Bring your own participants. Perfect when you have an existing audience or specific contacts you want to invite to your study
- Screener questions: Use Conveo’s built-in screener questions to automatically qualify or disqualify participants before the interview
Reporting Sub-Par Participants
A provider participant who opened the study but never started answering can be marked abandoned after the applicable inactivity timeout and reported to the provider as a drop-out. This is different from a completed interview; unused CSV invitation placeholders are not treated as participant drop-outs merely because they exist. Review completed interviews promptly. Participant reporting and payment eligibility vary by provider; check the reporting action available on the interview before assuming a participant can still be rejected or their payment stopped. For step-by-step instructions on how to report a participant, see How to Report a Participant.What Affects Recruitment Speed
Incidence Rate
How common your target audience is within the panel population. Lower incidence audiences take longer to recruit
Geographic Restrictions
Narrow location requirements (e.g., specific cities or small countries) can significantly reduce available participants
Quotas & Screeners
Complex quota structures or strict screener logic increase screen-outs and slow recruitment
Incentive Level
Higher incentives generally increase participation speed. Below-market incentives may slow recruitment
Interview Length
Longer interviews require higher commitment, which can reduce completion rates and extend timelines
Recruitment speed depends on the combination of these factors. Stricter targeting and longer interviews typically require more time to complete.
Complete Written Guide
Use the following steps to configure and launch recruitment.Step 1: Access Recruitment Settings
After setting up your topic guide, navigate to the Recruitment tab in your Conveo study dashboard. This is your central hub for managing how participants join your study.Step 2: Choose Your Recruitment Method
Select a panel by clicking the Add panel button, a different step-by-step process should be followed depending on what recruitment method you chooseStep 3: Set-up your Recruitment Method
Option A: Integrated Panel Providers (recommended)
- Choose from the available integrated providers based on their coverage (review the provider information shown)
- Click the Add panel button on the top right of the panel
- Complete the required recruitment specifications (including the incentives) - see dedicated section below
- Review the launch requirements, price, and billing account shown in the panel. Launch the panel, or request launch approval if required by your permissions and billing setup.
Option B: Partner panel
- Choose from the available partner panels based on their coverage (review the provider information shown)
- Follow the panel’s contact or quote-request flow to agree the audience, incentives, and recruitment cost.
- Set the panel limit to match the agreed recruitment plan; review recruitment limits.
- Follow the provider-specific link instructions, including participant identifiers and return URLs. Do not reuse one participant identifier for different people.
- Click Launch panel: This action is required to activate the study for this panel
Option C: Partner integrations
- Choose from the available partner integrations based on your study needs
- Set a panel limit if required; review recruitment limits.
- Follow the instructions on the page to integrate with the Conveo study
- Click Launch panel: This action is required to activate the study for this panel
Option D: Self-Recruited Panels
Option D.1: shareable link
- Set a panel limit if required; reaching the limit stops new admission as described under recruitment limits.
- Configure participant email collection if you want to capture contact information
- Launch the panel using the action shown in its setup.
- Share the generated link through your preferred channels.
Option D.2: upload a CSV
- Put participant email addresses in the first CSV column. If the study defines routing properties, include those columns using the format shown by the upload form. Additional participant properties can be used as analytics filters.
- Upload the file and wait for processing to finish. The panel generates a unique link for each participant.
- Launch the panel before inviting participants.
- Use Send emails to send invitations, or distribute the individual links yourself. Use Remind for participants who have not started. Select an available study language for invitations and reminders.
Option D.3: Add a custom panel
- Set a panel limit if required; reaching the limit stops new admission as described under recruitment limits.
- Share the invitation link with the panel provider; note this contains placeholders for “participant ID” and “completion URL” (the latter is the page to which the participant is redirected after completing the Conveo study) that need to be updated by your panel provider
- Click Launch panel: this action is required to activate the study for this panel
Step 4: Monitor Recruitment Progress
Review panel progress and the Interview Grid. Compare completions with limits and quota capacity before increasing recruitment. Qualified or ongoing interviews can still be using reserved capacity.Recruitment Specifications (Panel Providers)
Provide these details through the selected panel’s setup or quote process. The available targeting fields vary by provider.- Specify your target number of participants (e.g., 40 people)
- [only for integrated panels] Set the incentive per participant: an estimation can be made through the panel provider
- Set geographic requirements (e.g., Belgium)
- Define demographic criteria:
- Age ranges (e.g., 30-55+)
- Gender preferences
- Interest categories
- Share any required project information (name, description for participants, etc.)
For screening questions, we recommend using Conveo’s built-in screener questions instead of panel-side screening. Conveo screeners apply qualification rules in your study and make recorded screener answers available alongside the interview data.
Best Practices
Before You Start:- Clearly define your ideal participant profile before setting up recruitment
- Review the real recruitment link and provider redirects before sharing widely. A test interview bypasses quotas and the study response limit during screening, so preview alone cannot validate live admission
- Monitor your participant limit if you’ve set one - you might need to adjust based on response rates
- Review screener question responses in the Interview Grid to ensure you’re getting quality participants
- Review your screener question criteria to balance specificity with realistic availability
- Track response rates and adjust your approach if needed
Anything missing? Let us know at support@conveo.ai and we’ll help you out!